

How To Outline Parking Lines In Pictures With Photoshop

How to Edit Auto Photos in Lightroom
Unedited car pictures can often lack color and emotion. Sometimes it'due south because they were shot with the wrong photographic camera settings or but because the image is straight out of the camera and hasn't been edited yet.
Our solution tin can be found using the editing tools institute in the Develop Module of Lightroom. Each adjustment you brand tin can transform the expect of the image, good or bad. So what is the best style to edit car photos?
In this tutorial, I bear witness yous iv easy steps to transform whatsoever automobile movie from a dull RAW file to a digital masterpiece! The focus here is to make the car blend well with the environs and also have it stand up out equally the main subject field of the prototype. Let'southward begin!

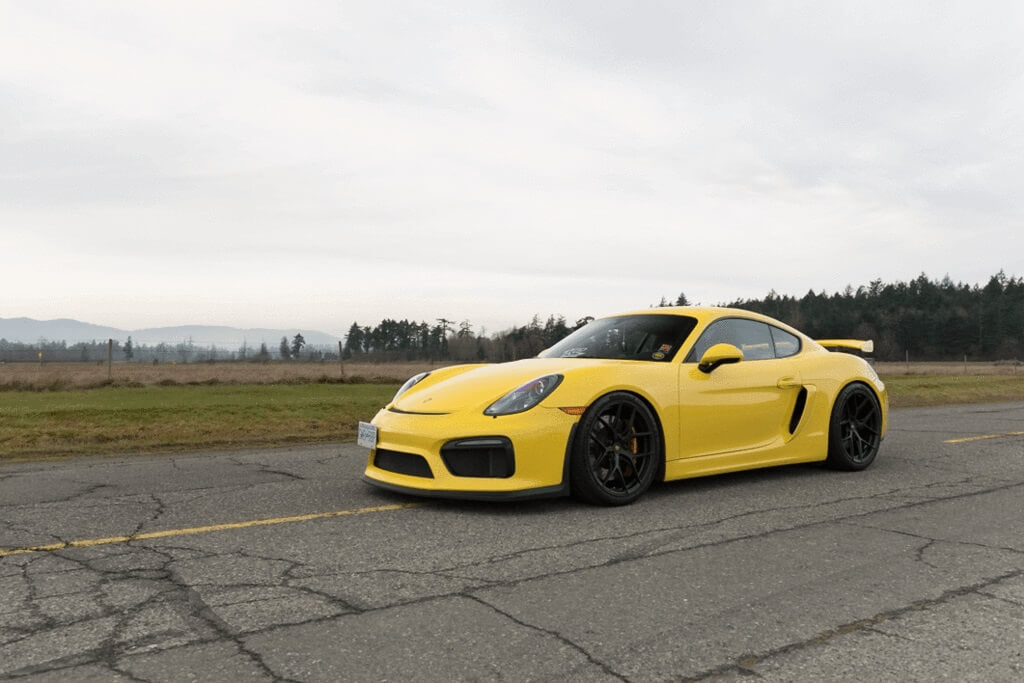
Here is my original, direct out of camera image:
Footstep 1: Have Care of The Nuts
I begin my editing process in the Bones department of the develop module. This office is what I like to call the "meat of the burger" because nosotros take care of the base of operations exposure that decides the main expect of the image.
Starting time at the top of the Bones Panel past adjusting the white balance first. Since the original image is a bit light-green and warm, I will lower the temperature to 5600 and increment the tint to 10.
All of the other sliders beneath those two, from exposure to saturation, can be adapted based on your personal preference. Just make sure non to go overboard with increasing the exposure, highlights, or whites too much, or you may lose valuable details like color and texture.
A good rule of thumb is to keep the clarity beneath 30 but above 0. Abusing the clarity slider volition result in the image beingness too dramatic, which can expect unprofessional. When in doubtfulness, make your adjustments in moderation.

Footstep two: Color Adjustments
At present it's time to make detailed adjustments to each of the colors. Click on the "HSL/Colour/B&Due west" icon and then on "All" to show all the colors. For these adjustments, I will begin at the top and piece of work my way down:
Red - I Added a bit of saturation to make brake calipers popular more than.
Orange - There's nothing orange in this pic, so I skipped it.
Yellow - I increased the saturation to prove how cool the paint color is. But I brought the luminance (brightness) down a notch to maintain the integrity of the paint shade.
Green - The grass in the back is too greenish for the look I am going for, so I moved the hue slider downwardly to full yellow to completely remove the saturation of this color. Then I added some luminance, then the grass wasn't too wearisome.
Aqua - I slightly increased the hue to reduce the teal tinge of the windows effectively.
Blue, Majestic, and Magenta - For this image, I ignored them.

Next, I will apply the Color Grading Console to totally change the feel of this machine photo. It works past moving the small circle within each of the larger circles to choose the hue and amount of saturation you desire to add to that particular part of the image. There are circles for the highlights, mid-tones, and shadows. Keeping the small circle shut to the center will apply a hue with very little saturation. Moving the circle closer to the outer edge will apply much more than saturation.
I chose to make the highlights warm and the shadows blue in this case. I never affect the Balance slider, as that makes everything more complicated.
The selection of colors is based on colour theory, which is a separate form on its own. Just at the end of the day, choose whatever pleases your eye the virtually. Personally, I like to keep the highlights yellow/orange and the shadows bluish, equally that combination looks the most natural.

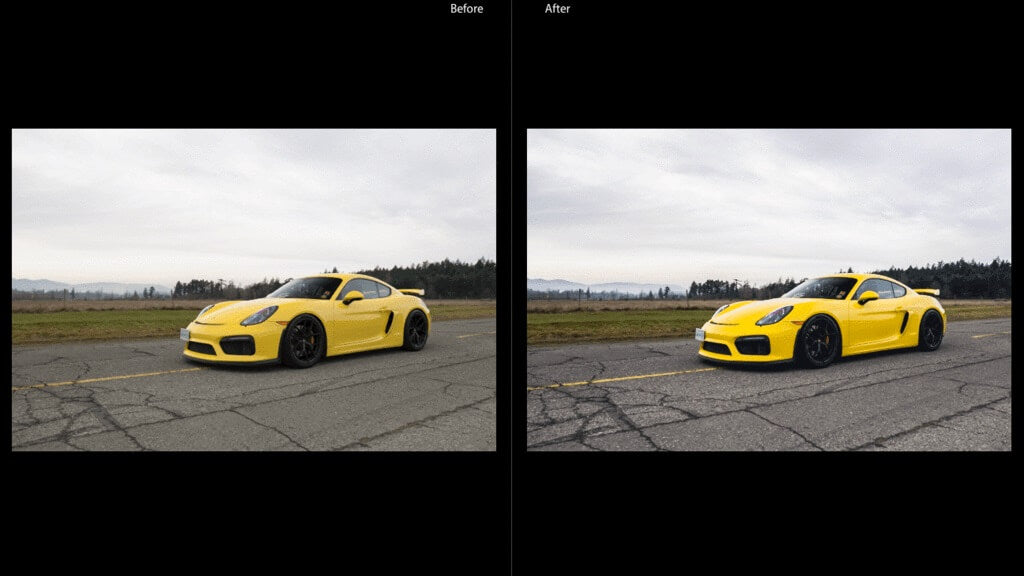
You tin can see above that the image now looks much more refined in terms of exposure and colour. However, it still lacks the punch that makes information technology a concluding production.
That's where the linear slope tool (formerly called the graduated filter) comes in:
Step three: Utilize Linear Gradients (Formerly Graduated Filters)
What sets an amazing motorcar photograph apart from an ordinary one is how much the auto stands out from the background. Because after all, information technology is the main subject!
If you lot're taking photos of a motorcar, it's probably parked on the route. A bully manner to make the auto stand out AND add drama to your prototype is to brand the road and the sky darker. This can be accomplished in Lightroom by using the Linear Slope Tool.
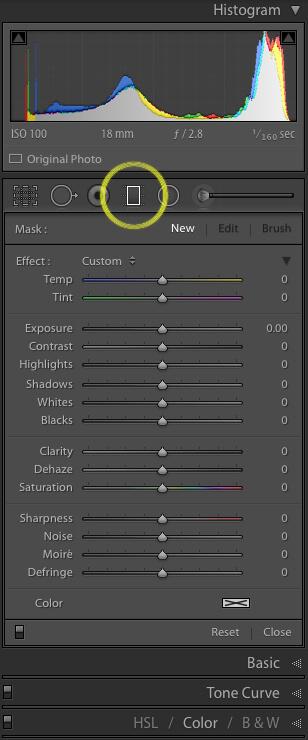
Linear Gradients are constitute in the Masking Console. To access them, click on the Masks icon (circumvolve icon with a dotted outline) in the toolbar located above the Basic Panel and below the Histogram Panel.
If y'all have no current masks on your prototype, when you click on the icon, a list of options volition open, and you can choose the Linear Slope tool. If you accept already practical masks to your image, click on the "+" push at the top of the Masks Panel that opens, and so choose Linear Gradient.

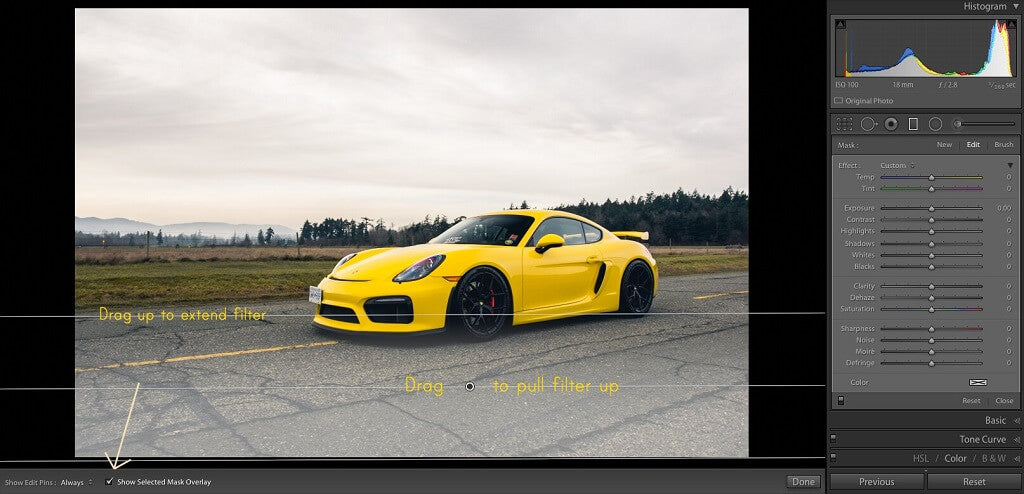
Once you have called the Linear Slope tool, drag on your paradigm from the bottom of the image up to the car. You will now run across 3 white lines with a black dot in the heart.
Elevate the middle line to motility the filter and the pinnacle line to suit the length of the filter. Click "O" on your keyboard to show the selected overlay of the filter y'all made - you should see the pointer by "Show Selected Mask Overlay" ticked. For this linear gradient, I volition decrease the exposure to -1.l to make the ground a bit darker.
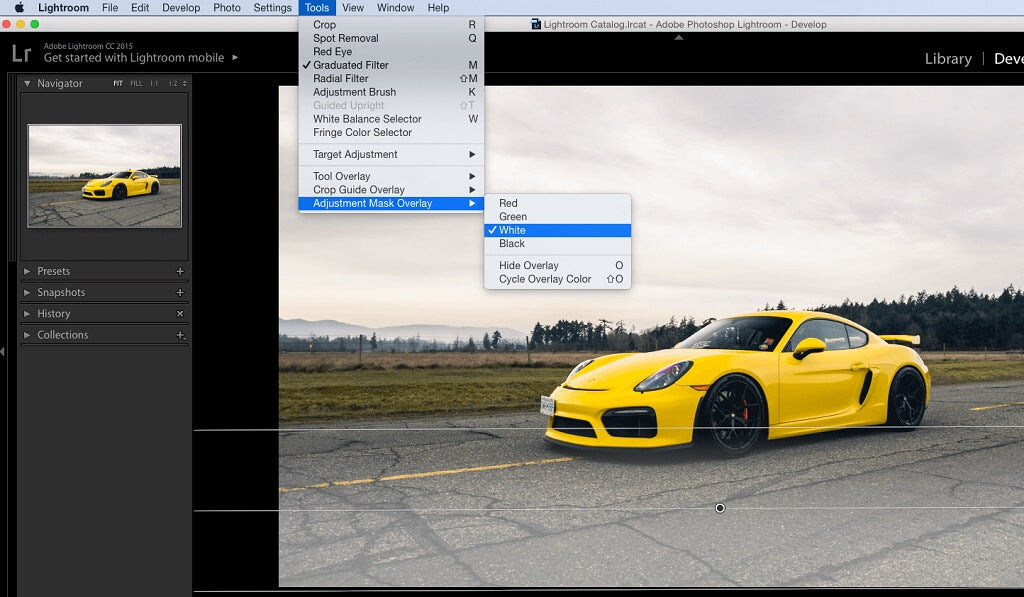
Yous tin alter the Overlay color in Lightroom by going up to the menu bar of your screen, clicking on "Tools," and hovering over "Adjustment Mask Overlay." There are four colors to choose from: reddish, green, white, and black. The color yous choose isn't a big deal, only it's best if it's separable from the part of the epitome you are working on.
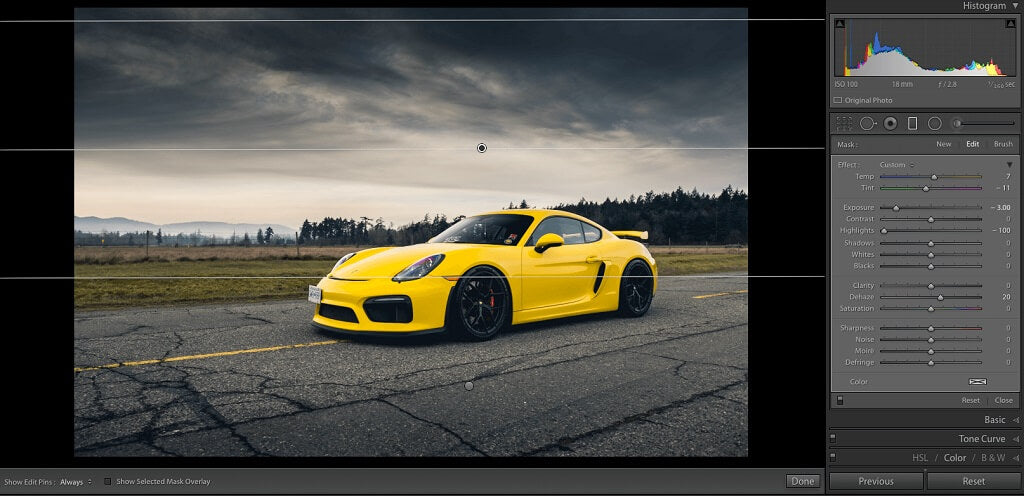
Side by side, I will create some other linear gradient, but this time for the sky. Since the clouds are pretty tedious, I desire to darken them significantly to add more drama while also bringing more focus to the car.
With this slope, I completely lowered the highlights, pulled down the exposure, removed a flake of brume, and added a hint of warmness to complement the yellow pigment. The goal here is to draw the viewer's middle to the car while at the same time maintaining the natural look of the environment.
Pace 4: Final Touches Using the Brush Tool
At present the car image looks spot on, and the edit is nearly complete. Nonetheless, I want to add some finishing touches by darkening the side windows and boosting the dissimilarity of the wheels using the Brush tool.
The Brush tool is also located in the Masking Panel. Yous can access it in the aforementioned manner you accessed the Linear Gradient. Click the " Brush" choice instead of choosing Linear Gradient from the open options.


For the brush settings, I keep the menstruum/density at 100 and the feather at 20. The brush size depends on how much particular y'all are working with - for this image; I left it at 17.

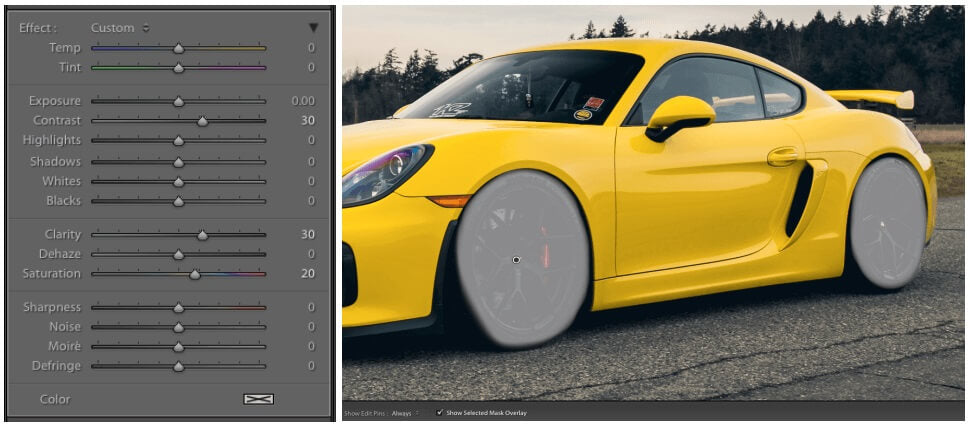
To heave the contrast of the wheels, I increased the clarity, saturation, and contrast of my aligning brush. The option doesn't have to exist perfectly circular, just make sure not to brush over the car paint or the road.
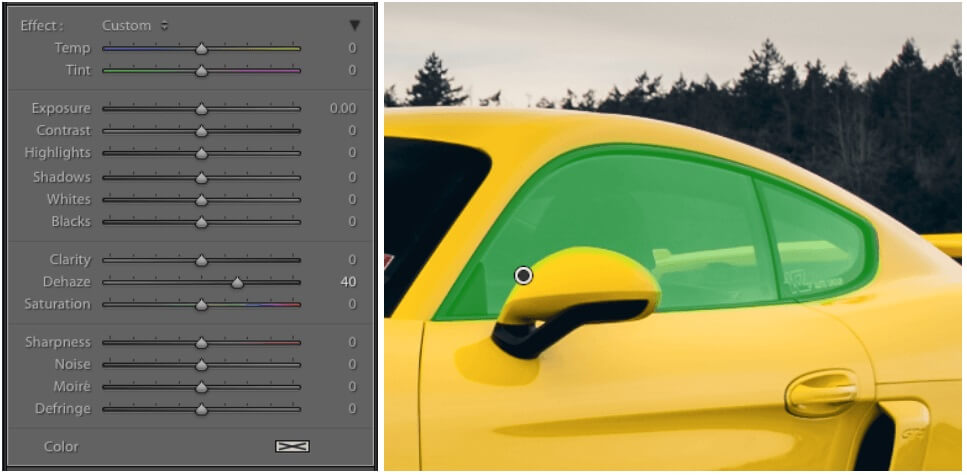
Concealment the side windows is elementary. Just make your choice and and so increase the Dehaze slider. Don't rush this step. Make sure your selection is entirely authentic - by covering the entire window but nowhere else.
Determination
In just four steps, you tin totally change the look and feel of any machine photo. The beauty of this process is that it tin be practical to any motorcar image (action or static) and can be customized to fit your style.
And since Lightroom is non-destructive, you lot can always undo whatsoever changes you made to your image. I hope you found this tutorial helpful!
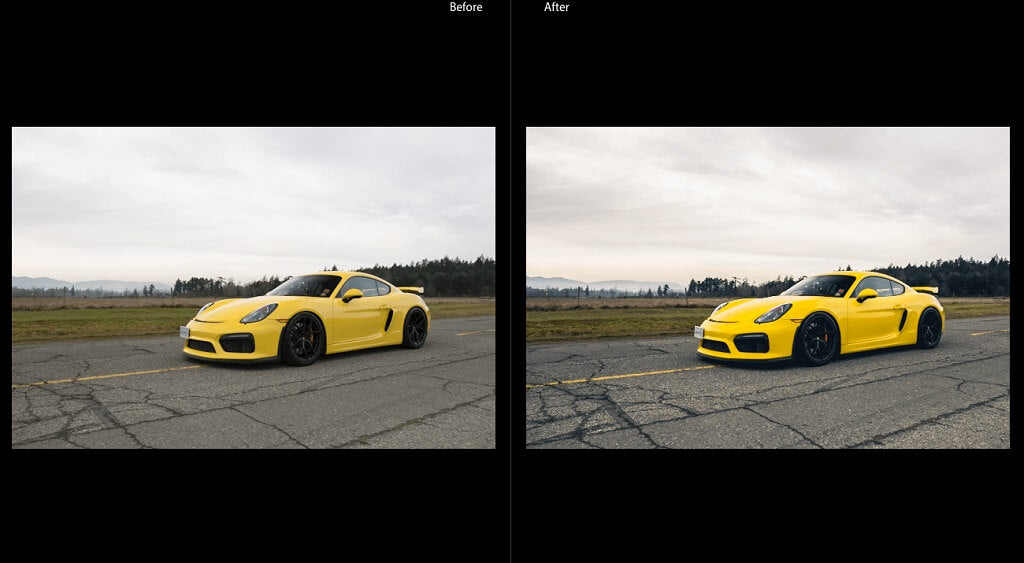
Hither are my final before/afterwards images:

Do you have any questions or comments nearly How to Edit Car Photos in Lightroom? Go out us a comment below - nosotros would LOVE to hear from you! And Please SHARE this mail using the social sharing buttons (we really appreciate it)!

Source: https://www.lightroompresets.com/blogs/pretty-presets-blog/how-to-edit-car-photos-in-lightroom
Posted by: riggsyoughted.blogspot.com
0 Response to "How To Outline Parking Lines In Pictures With Photoshop"
Post a Comment